Thiết lập Cisco SG300
Trong chương này, chúng tôi sẽ sử dụng Cisco SG300-10 làm ví dụ về quy trình cấu hình switch mạng. Đây là một switch quản lý 10 cổng, phù hợp với mạng quy mô nhỏ. Trong số các switch có giá thành hợp lý, SG300-10 là một lựa chọn tốt khi sử dụng trong mạng Dante. Nếu hệ thống mạng lớn hơn, bạn có thể chọn SG300-20, phiên bản có 20 cổng.
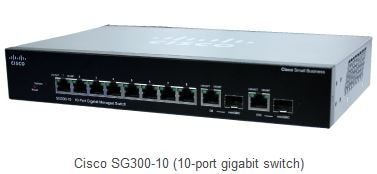
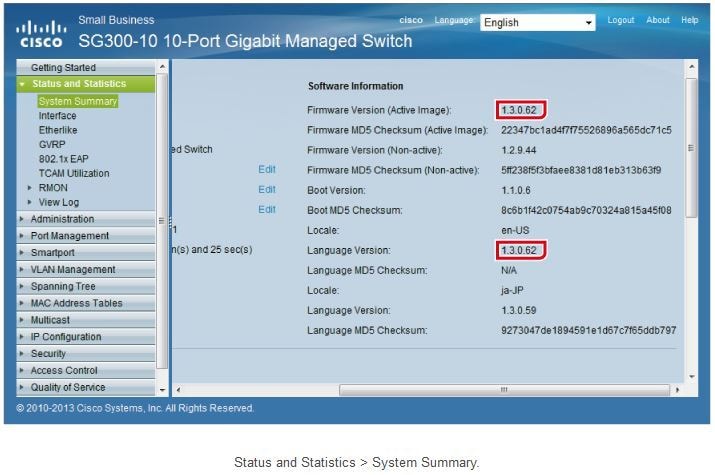
Các bước thiết lập sau đây được thực hiện trên SG300-10 với firmware phiên bản 1.3.0.62. Các cài đặt mặc định có thể thay đổi tùy theo phiên bản firmware mà bạn đang sử dụng. Khi cấu hình switch quản lý khác, hãy lưu ý rằng giao diện người dùng và thuật ngữ có thể khác nhau giữa các nhà sản xuất.
Chuẩn bị cấu hình switch mạng
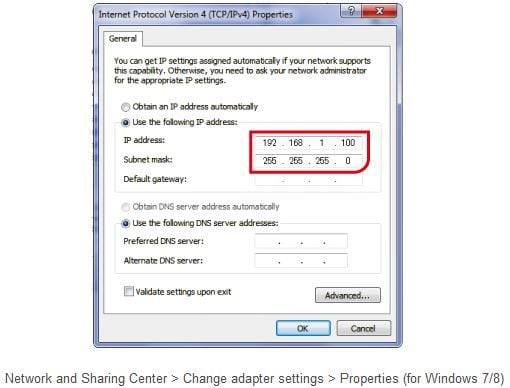
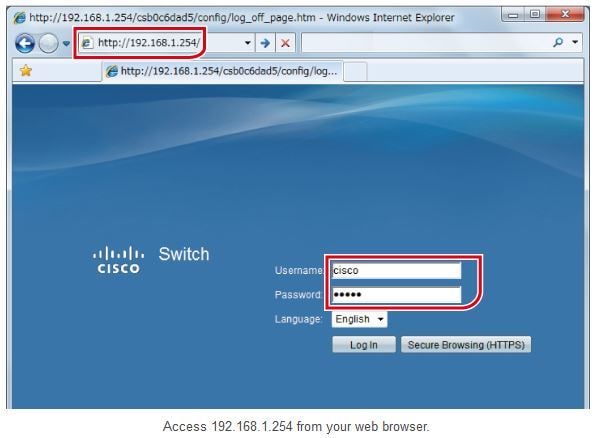
Cách đơn giản nhất để cấu hình switch là truy cập vào trình duyệt web từ PC. Mở trình duyệt, nhập địa chỉ IP của switch. Mặc định, địa chỉ IP của switch là 192.168.1.254, với tên đăng nhập và mật khẩu đều là “cisco”. Trong trường hợp này, trước tiên bạn cần đặt địa chỉ IP của PC trong phạm vi 192.168.1.x (ví dụ: 192.168.1.100) và đặt subnet mask là 255.255.255.0.
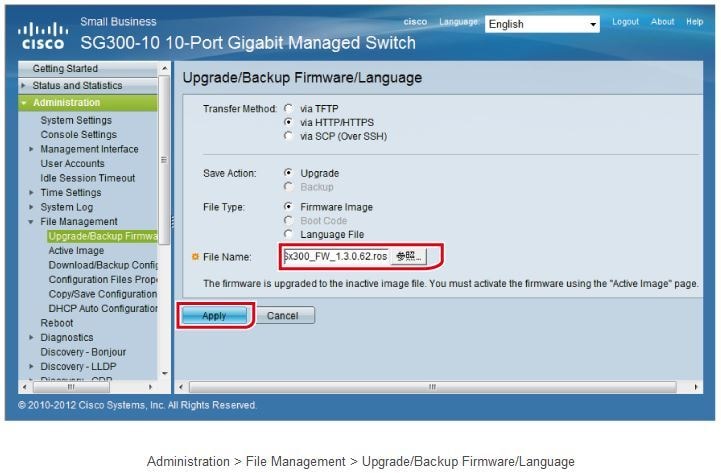
Trước tiên, chúng tôi khuyến nghị bạn kiểm tra phiên bản firmware (và file ngôn ngữ nếu cần) và cập nhật firmware nếu cần thiết. Truy cập trang web của Cisco để kiểm tra phiên bản firmware mới nhất.
Bạn có thể cập nhật firmware bằng cách truy cập trang cài đặt firmware. Trước khi cập nhật, hãy tải file firmware (và file ngôn ngữ nếu cần) từ trang web của Cisco. Lưu ý rằng sau khi tải firmware lên, bạn cần kích hoạt firmware và khởi động lại switch.
Chúng tôi khuyến nghị bạn thay đổi địa chỉ IP của switch thành 192.168.0.x (ví dụ: 192.168.0.254). Các thiết bị Yamaha PA cũng sử dụng dải IP 192.168.0.x cho mạng điều khiển (không phải mạng Dante) theo mặc định. Việc sử dụng cùng dải địa chỉ mạng (192.168.0) giúp bạn có thể truy cập cả hai từ một máy tính duy nhất. Đặt IP Address Type thành “Static”. Trong ô Địa chỉ IP, nhập “192.168.0.254”, sau đó nhấn “Apply”.
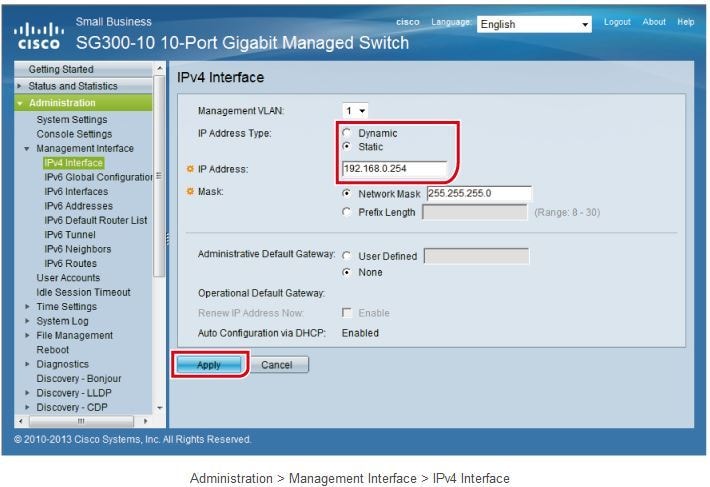
Sau khi thực hiện bước này, địa chỉ mạng của switch sẽ thay đổi và kết nối với PC sẽ bị mất. Hãy nhớ đặt địa chỉ IP của PC vào cùng dải mạng với switch (ví dụ: 192.168.0.100).
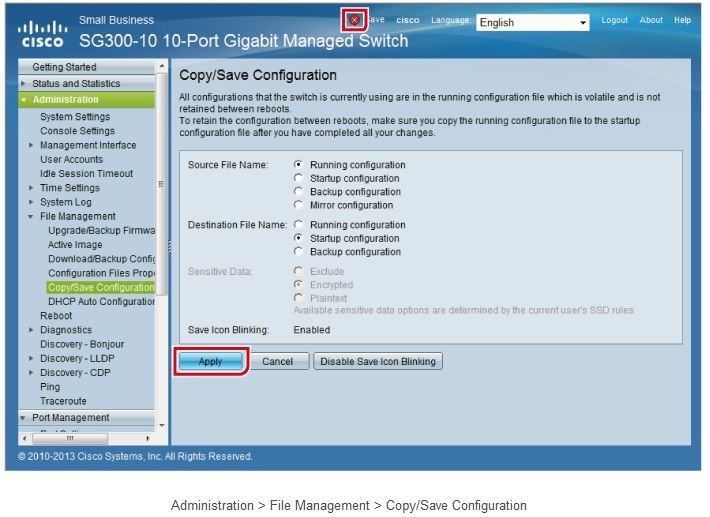
Sau khi thay đổi cài đặt switch, hãy nhớ lưu lại. Nếu tắt nguồn mà không lưu, tất cả cài đặt bạn thay đổi sẽ trở về giá trị trước đó. Vì chúng ta đã thay đổi địa chỉ IP, hãy lưu cài đặt switch.
Khi thay đổi cài đặt, chữ "Save" sẽ nhấp nháy ở đầu màn hình. Nhấn "Save" để mở trang tiếp theo. Đảm bảo rằng "Source File Name" được đặt là "Running configuration" và "Destination File Name" được đặt là "Startup configuration", sau đó nhấn "Apply".
Quá trình chuẩn bị cấu hình switch mạng đã hoàn tất.


